Installing moulding in your home is an easy way to increase value and interest in it. There are several types of moulding that you want to consider. Let’s talk about some of the tips from the pros when it comes to moulding installation.
1. Moulding Basics
First, some general tips that apply to installing moulding of all types. You might want to cut your moulding a little bit longer than necessary. It’s easy to trim but impossible to lengthen later. Use your drill to predrill holes in the moulding. This prevents nails from splitting the moulding when you nail it to the wall. If you decide to use a power miter saw, make sure that it has at least a 60-tooth blade on it.
Determine how much moulding you will need for your project. After cutting your moulding to the needed lengths, apply the finish. It is much faster and easier to apply the finish before attaching the moulding.
2. Installing Crown Moulding

There’s no doubt that crown moulding sets your home apart from the others. It creates a flair that speaks of fine finishes. You should know before you begin a crown moulding project that the most challenging part of the crown moulding installation process is cutting the moulding, especially the corners. You can cut them with a coping saw, but a miter saw will give you the best results.
If you are hopeless at getting the cuts right for the corners... there’s another solution for you. Using corner blocks allows you to sidestep these awkward cuts altogether.
3. Installing Baseboard Moulding
If crown moulding is a luxury, installing baseboard moulding is a necessity. Your home will look unfinished without it. There’s a bit of bad news for those who used the corner blocks when installing crown moulding. You must make miter cuts when installing moulding around your baseboards.
Choose a baseboard style that matches the style of your home. Deciding on custom-crafted millwork offers endless possibilities, and the opportunity to create something unique.
4. Installing Wall Moulding
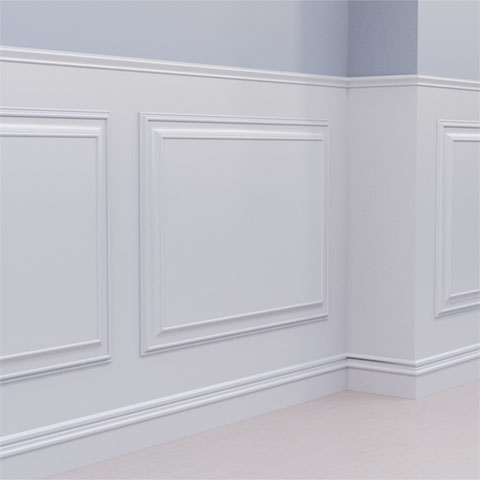
Installing moulding on the walls, such as chair railing, or wainscoting, shows your dedication to distinction. Don’t limit your thinking to foyers and dining rooms. Wall moulding can add pizazz to any wall in your house that needs a little something.
Remove your crown moulding (if you have it) and your baseboard moulding before you get started to take accurate measurements. Build a frame around the area you want to accent or each wall that you are decorating completely.